
How to Connect a Website with Google Search Console Step-by-Step Guide
What is Google Search Console
Google Search Console (GSC) is a free tool offered by Google that helps website owners monitor, analyze, and optimize their site’s presence in search results. It provides valuable insights into search performance, indexing status, and technical errors that might affect a website’s visibility.
Why is Google Search Console Important?
- Helps monitor website performance on Google
- Identifies indexing issues and crawl errors
- Submits sitemaps for better indexing
- Provides insights on search queries and traffic
- Detects mobile usability issues
- Helps improve website SEO and ranking
If you run a website, Google Search Console is an essential tool to ensure that your pages appear correctly in search results and that Google can crawl and index them efficiently.
Prerequisites Before Connecting to Google Search Console
Before you start connecting your website to Google Search Console, make sure you have the following:
- A Google Account – You need a Google account to access the Search Console. If you don’t have one, create it at Google Sign Up.
- Access to Website Ownership – You must have the ability to verify ownership of the website. This means you need access to either the hosting account, Google Analytics, or the ability to edit the site’s source code.
- Website Sitemap (Optional but Recommended) – A sitemap helps Google understand your website structure. You can generate a sitemap using plugins (Yoast SEO for WordPress, Rank Math) or online tools.
Step-by-Step Guide to Connecting Your Website to Google Search Console
Step 1 – Sign in to Google Search Console
- Go to Google Search Console.
- Sign in using your Google account.
Step 2 – Add Your Website Property
- Click the “Start Now” button.
- You will be asked to add a property (your website URL).
Step 3 – Choose Property Type (Domain vs. URL Prefix)
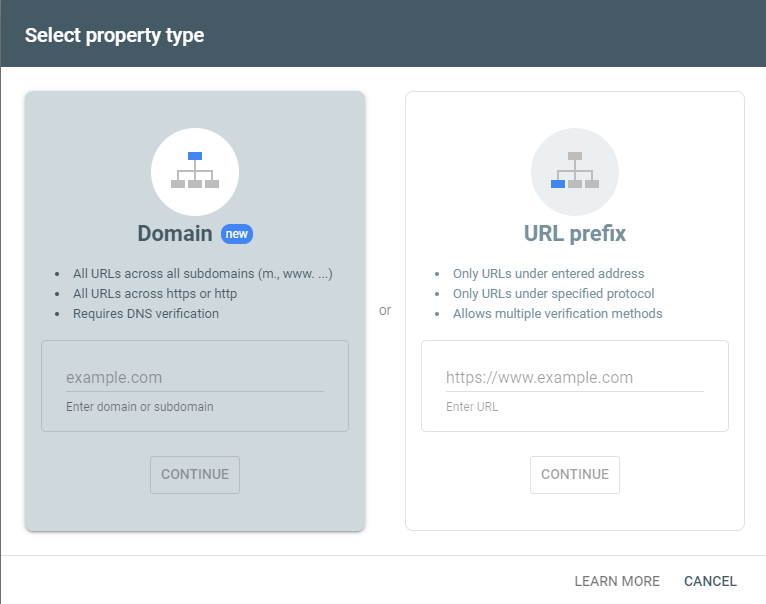
Google Search Console gives you two options when adding a website:
- Domain Property – Tracks everything under the domain, including subdomains (e.g., example.com, blog.example.com). Requires DNS verification.
- URL Prefix Property – Tracks only the exact URL entered (e.g., https://www.sdigitalvibes.com). Offers multiple verification methods.
Choose the appropriate type based on your needs. For complete tracking, “Domain Property” is recommended.
Step 4 – Verify Website Ownership
Google needs to confirm that you own the website before granting access. There are several verification methods:
1. DNS Verification (Recommended for Domain Property)
- Google provides a TXT record.
- Add the TXT record to your domain provider (e.g., GoDaddy, Namecheap, Bluehost).
- Save changes and click “Verify” in Search Console.
2. HTML File Upload (For URL Prefix Property)
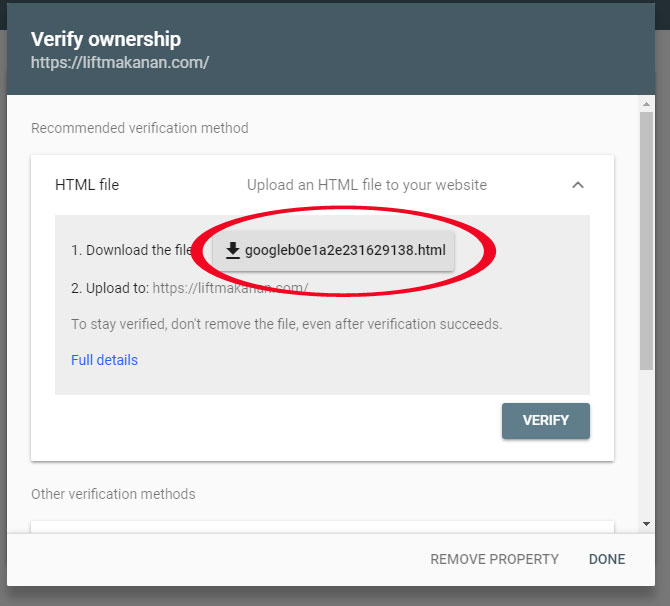
- Download the provided HTML file.
- Upload it to your website’s root directory via FTP or file manager.
- Click “Verify” in Search Console.
3. Meta Tag Verification
- Copy the provided meta tag.
- Paste it into the <head> section of your website’s homepage.
- Click “Verify” in Search Console.
Once verification is successful, your website will be linked to Google Search Console!
