How to Add a Sitemap to Google Search Console with Yoast SEO
Using Yoast SEO, a popular WordPress plugin, you can easily generate and submit a sitemap to Google Search Console. Follow these steps to do it correctly.
Step 1: Install and Activate Yoast SEO Plugin
- Log in to your WordPress dashboard.
- Go to Plugins > Add New.
- Search for “Yoast SEO”.
- Click “Install Now” and then “Activate”.
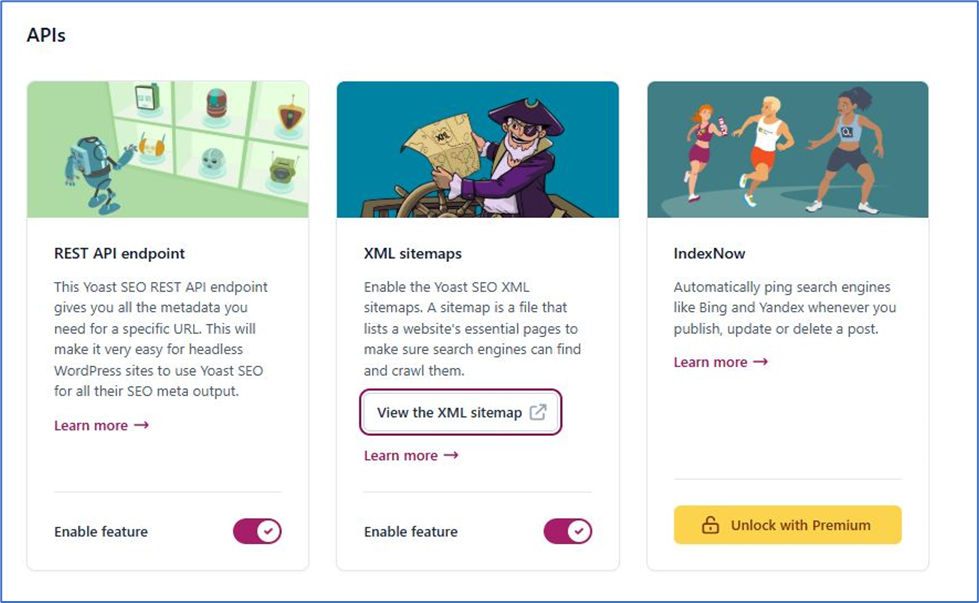
Step 2: Enable XML Sitemap in Yoast SEO
- In your WordPress dashboard, go to Yoast SEO > Setting > General>
- Click the “Site Features” tab.
- Scroll down to APIs section & look for “XML Sitemaps” and ensure it is enable Feature.
- Click “Save Changes” if needed.
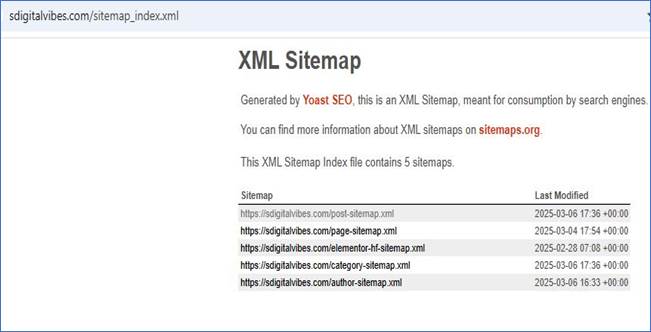
Step 3: Find Your Sitemap URL
- Click the “View The XML SiteMap” icon next to XML Sitemaps in Yoast SEO.
- A new window will appear & Your sitemap URL should look like this:
Step 4: Add Sitemap to Google Search Console
- Go to Google Search Console and log in with your Google account.
- Select your website property from the list.
- In the left menu, click on “Sitemaps”.
- Under “Add a new sitemap”, enter your sitemap URL:
pgsql
CopyEdit
sitemap_index.xml

Click “Submit”.
Step 5: Verify Sitemap Submission
- After submission, Google will process the sitemap.
- A confirmation message will appear if successful.
- If errors appear, review them and fix any issues.
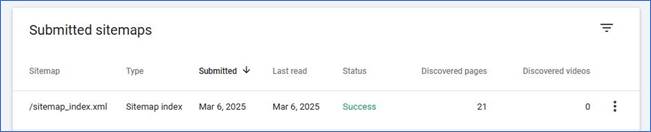
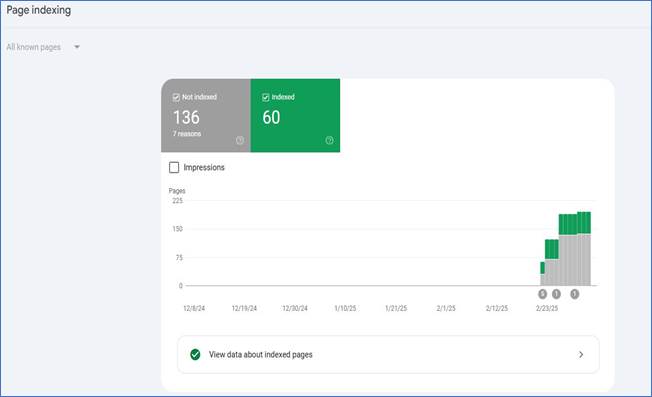
Step 6: Monitor Sitemap and Indexing Status
- Go to Sitemaps in Google Search Console.
- Check the status of your submitted sitemap.
- Google will display the number of pages indexed from your sitemap.